8 TIPS FOR AUTO CHARTING YOUR LAKE MAPS WITH HUMMINBIRD HELIX
By: Jeff and Jason Matity
As technology improves, so does our chance to consistently catch more fish. It was GPS technology that first put us in that sweet fishing hole. Now, with the Humminbird Helix series AutoChart feature, we can take it further by 'colouring' our hydrographic maps. It is fun and insightful in helping us understand vegetation, bottom structures, and depth contours to locate best fish-holding areas.
1. Mapping the safe way
Mapping takes discipline and is best done without a line in the water. Spend more time watching where you are going than staring at your fish finder. The safety of you and others on the water is of utmost importance. It is one of the reasons why we like AutoChart in the Spring and Fall. Both periods offer significantly less boat traffic than Summer. We spend more time mapping and less time dodging other watercraft.
2. Start at Zero
Your Helix unit has limited internal space to save your AutoChart Map data. Therefore, investing in a Humminbird® Autochart Zero Line card comes in handy. This card snaps into the side of your unit and allows recording of 32 GB of data. You can insert the card into another unit if you upgrade or put it into a computer to back up your AutoChart Map Data.
3. Save, save, save
Most people have experienced losing data with their phone or computer, only to have the power flicker or fail, and the work vanishes because they did not hit the SAVE command. We learned this the hard way after powering our Helix fish finder from our starting battery. One day, after completing a three-hour mapping session, we decided to try a favourite spot for walleye.
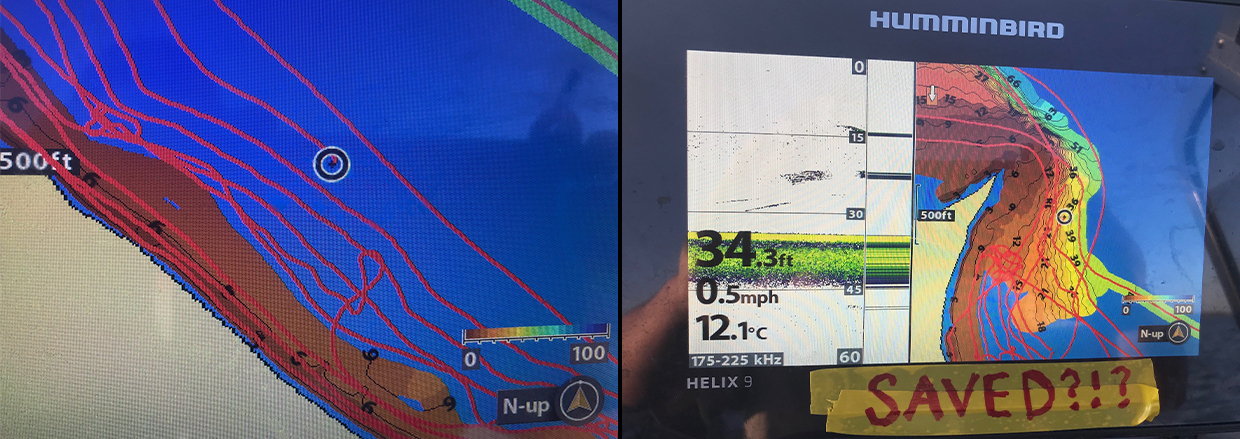
The Humminbird Helix showed our completed AutoChart Map. We forgot to save it. Then we turned the key to start the big engine, and the Humminbird screen went black. We powered up the fish finder and scrolled to the lake section we’d just mapped. We saw nothing but pretty grid lines from our mapping passes. We were unable to recover the map. Get in the habit of hitting save frequently.

On the left is the image we saw when we re-started the Humminbird after the shutdown because we did not first save it. To avoid this happening again, we placed a reminder on the right with the word "SAVED?!?" to prompt us to always save the files.
4. Dedicate your power
After that experience, we recommend a dedicated 12-volt battery for your fish finder. These new fish finders use considerably more power than the small black-and-white screens we grew up with. A dedicated power source reduces the chances of your fish finder turning off unexpectedly. It also reduces the chances of your boat not starting at the end of a mapping session because you killed the house battery.
5. Safety in unfamiliar waters
Our home lakes are glacial prairie gems with limited underwater hazards. It contrasts with rocky, hazard-filled Canadian Shield Lakes, like Lake of the Woods, where Jeff and his wife Lori go every summer.
They troll at 6 mph, mapping dozens of islands and reefs in their quest for giant muskies. At this speed, Jeff can be quick on the steering wheel, throttle, and outboard trim to negotiate potentially dangerous areas. In unfamiliar or very tight spots, they cast under the power of the MinnKota Terrova trolling motor, with the outboard switched off and trimmed up out of harm’s way.
6. Know your throtte threshold
We AutoChart at 6-7 mph on straightaways and 4 mph on the corners. It allows you to move quickly enough and avoid “washouts” on corners. Washouts occur when the transducer skids sideways and cavitates on a curve causing map “blemishes.”
- If we are on a familiar lake, we speed up to get the boat up on the plane and then hold it at its lowest plane speed, which is about 13-14 mph. It is an ideal speed for AutoChart in shallower depths (5-15 feet of water).
- In deeper water, we slowed from the plane down to 9 mph.
- Speed mapping is best when winds are low, the water is calm, and there is no bouncing of the bow to jostle the transducer from its optimal, parallel angle with the bottom.
- When the water is slightly choppy, adjust your tactics, take a big “sausage-shaped” bite out of shoreline and work from the perimeter inward.
- We still do the shallow-water speed run with the wind but hold steady against the breeze (with a reduced speed for the deep-water stretch).
Tip: The faster you go, the less detailed your AutoChart map will be. Slow down if you have more complicated structures like reefs, dramatic depth changes or inside turns.
7. Map-blemish Fix
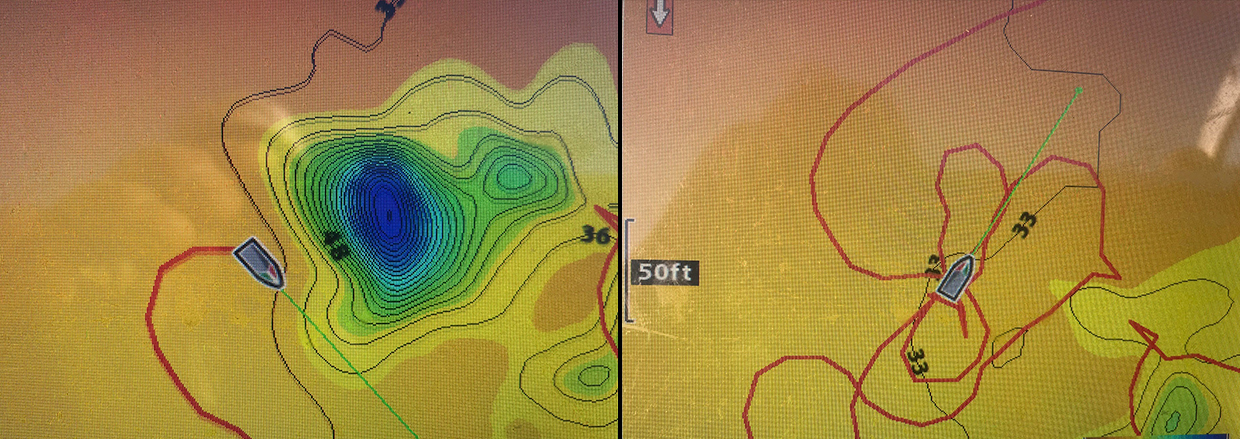
Sometimes, you end up “washing out” on a turn or a speed run. What you will see is a blemish that looks like a “black hole” on your map. There are two ways to fix this:
- Option 1: Position the boat over the black hole and “hover” in the middle of it. The hole begins to shrink rapidly as the Helix unit continually truths the data and finally morphs into the colour of the surrounding map.
- Option 2: The Technological Angler website is a treasure trove of information on how to run your Humminbird products. They give step-by-step instructions on how to delete the data points instead of trying to erase them with repetitive passes through them.

On the left is the image where we had a black hole in our map. On the right is what the map looked like after hovering over the black hole to fix the map.
8. Hugging Curves
The general rule is to “run parallel” with the contours. On the “sausage-shaped” maps you cannot avoid “contour cutting” which is Auto charting up and down changing water depths. What the mapping image will create is a “dragging” effect. Think of it like a perfectly drawn water colour contour map that you swiped a wet paintbrush across and dragged the clean contour lines out of sync with the original map.
Return to these “drag marks” and carefully run the contour several times. You will “tighten up” the drag marks to accurately represent the true contour.